As alluded to in this post, I put together a boxed escape room for a Christmas party that would have otherwise been just a pub lunch. At least we were out of lockdown enough for that.

This will be a summary of what went into that escape room project, including seven of the puzzles.
Premise
The puzzle had a loose story of ‘you are at this party, but the staff are hostile, plus there are COVID regulations to deal with.’ The story was not as important as the puzzles – this was after all a social event for people who were just expecting a few beers.
Execution
A small boxed escape room doesn’t usually have space for physical locks, keypads, etc. Another method is needed to check answers. In this case, I built a self-contained interactive webpage using Twine and hosted it here. The first item in the box was a QR code (in-game as a COVID check-in) linking to the Twine page.
Twine has a bit of a learning curve to it. There may have been some better options – maybe there is a wordpress plugin that does what I wanted, but I could not find it at the time.
Because the Twine app was checking the answers, I was not limited to thinking in four-digit codes, like several of the games on the market. Several of the answers were free text. It was important to make sure the users are told exactly what to type in – no interpretation or parsing needed. They were verbatim copying text that they had found. The Twine app was made to check the answers in a case-insensitive way.
The puzzles themselves were each on a folded paper. In some cases, extra components were folded inside. The papers were designed in Powerpoint. This allowed me to keep and manage a consistent style and layout. Plus the tools for drawing simple shapes were very handy.
The boxes were from EXIT boxed escape rooms that I’d completed and kept. A4 full-page stickers were just big enough to re-wrap the outside with my own design. Mostly white to keep it simple. I did have to add tape to the long edges, to keep them from lifting off.

Summary of the puzzles
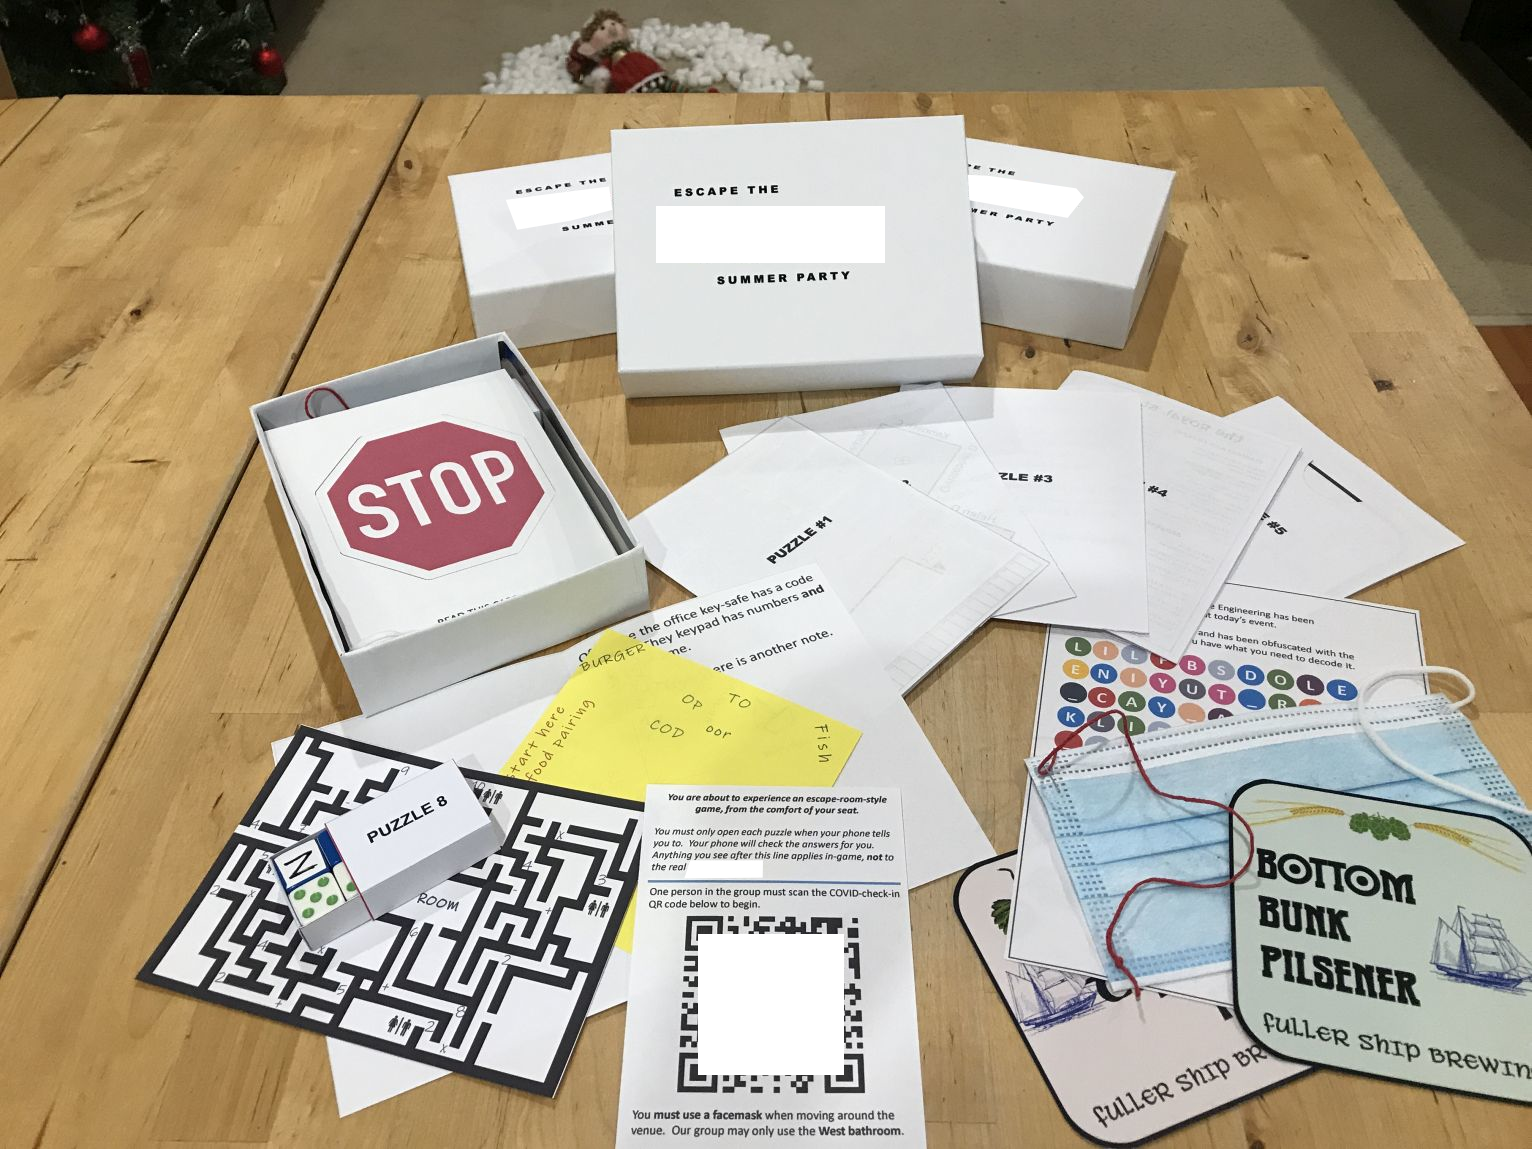
Box contents:
- Eleven numbered puzzle sheets, folded, some containing extra components
- Pencil
- Medical facemask, one earloop replaced by a red thread
- A box containing six dice, labelled ‘Puzzle 8’
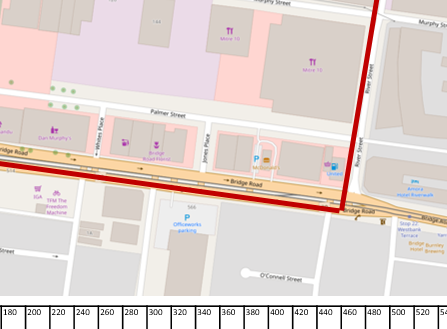
Puzzle 1 – How do you even get to this place?
The first puzzle is to get the gamers to start using various contents to solve the puzzles. This was a map with the route to the venue marked in red, with a scale alongside. The premise being that the boss wants to know how far the venue will be.
The solution is simply to use the red string from the facemask to trace along the route.
Puzzle 2 – Find the table number
This puzzle combines a few things:
- Instruction from the start of the game ‘use your facemask when moving around the venue’
- The text of the challenge itself ‘visit the other staff in order to find the table number, remember your contact tracing’
- A seating diagram with people’s names
- The pencil
Here, ‘in order’ means alphabetical order and ‘contact tracing’ means to draw the path around the tables. The drawing will show a number. BUT it will be gibberish without using the facemask. Hidden in the pleats of the facemask were instructions to skip certain staff members. Hence, the gamers have to ‘use the facemask’ in order to get the answer.

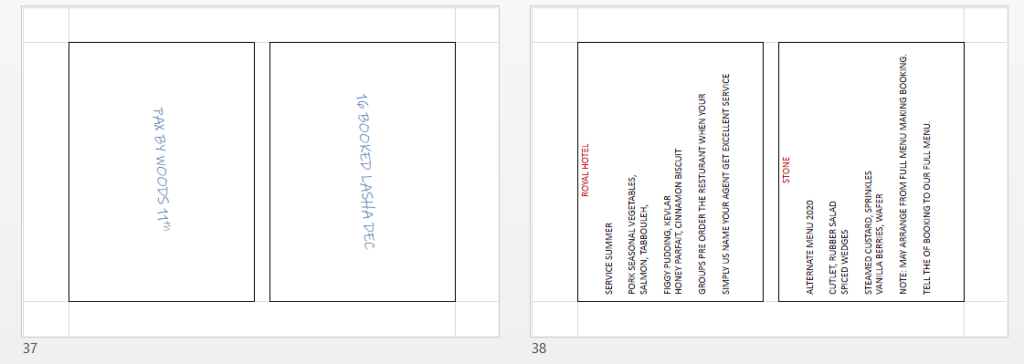
Puzzle 3 – The wrong menu
This one is a lesson in patience. Plus it’s something uniquely Australian. The staff have been mistakenly given the alternative drop menu. (This is where a party is catered by having two different dishes – say chicken and fish – and these are handed out to every other person: chick, fish, chicken, fish, chicken, fish. People can swap to get what they want. Apparently this is only a thing in Australia.)
In this case the ‘alternate drop menu’ was two bits of paper which form a complete menu when read alternately from each paper . It concludes with a note that the gamers must use the name of the booking agent in order to see the a la carte menu
This name is ‘hand’ written on the back of the menus. Also in alternating format.
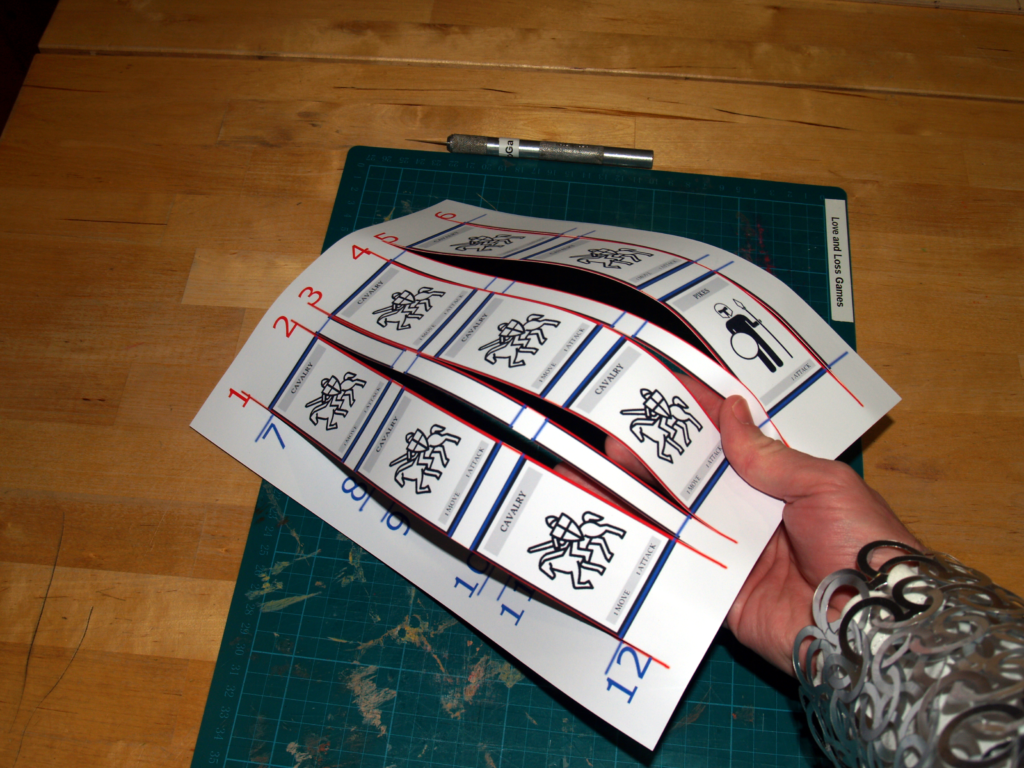
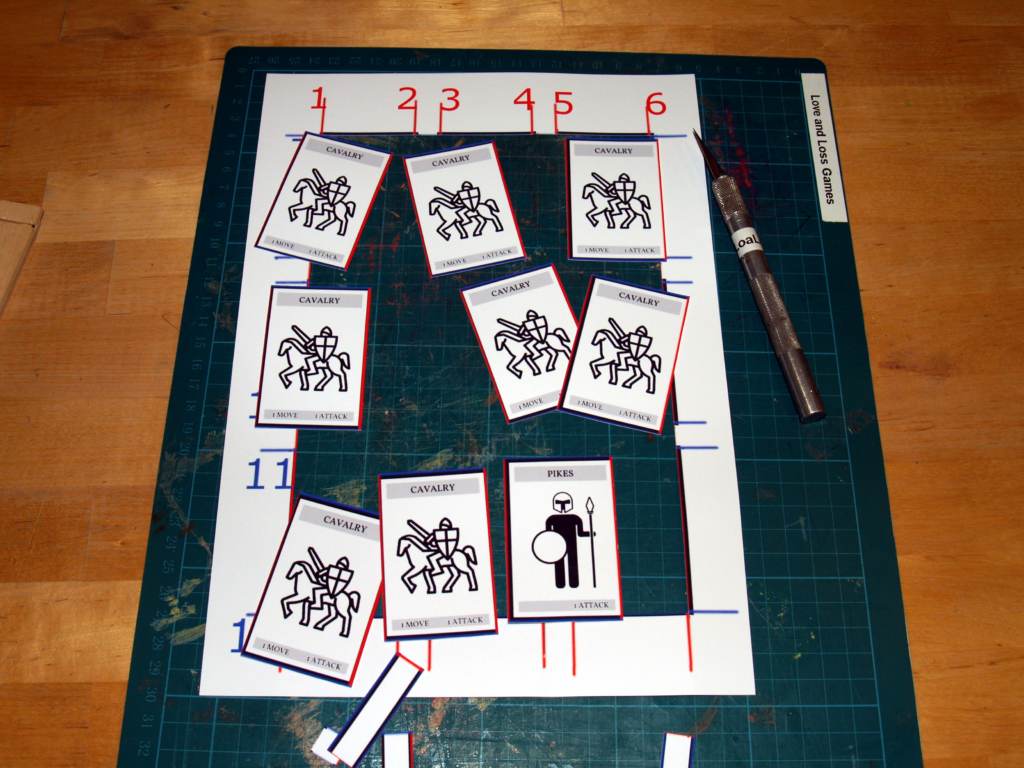
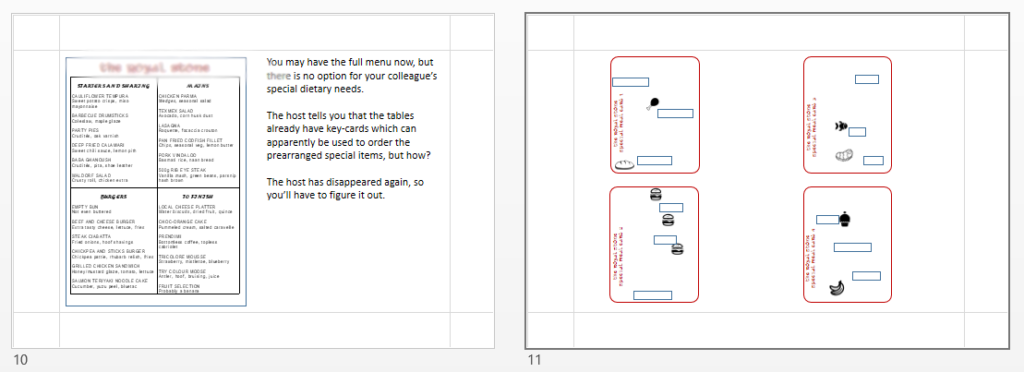
Puzzle 4 – Special menu
Now the guests have the a la carte menu, they have to find the special meal option for that one person. They have been given some access cards for this.
The premise is weak, but the puzzle was fun. Position the food icons on the cards over the words on the menu and read the words through the holes in the cards
This was made easier by having the menu quartered into rectangles the same size as the cards themselves. For a more hard-core audience, I would make the placement more arbitrary.
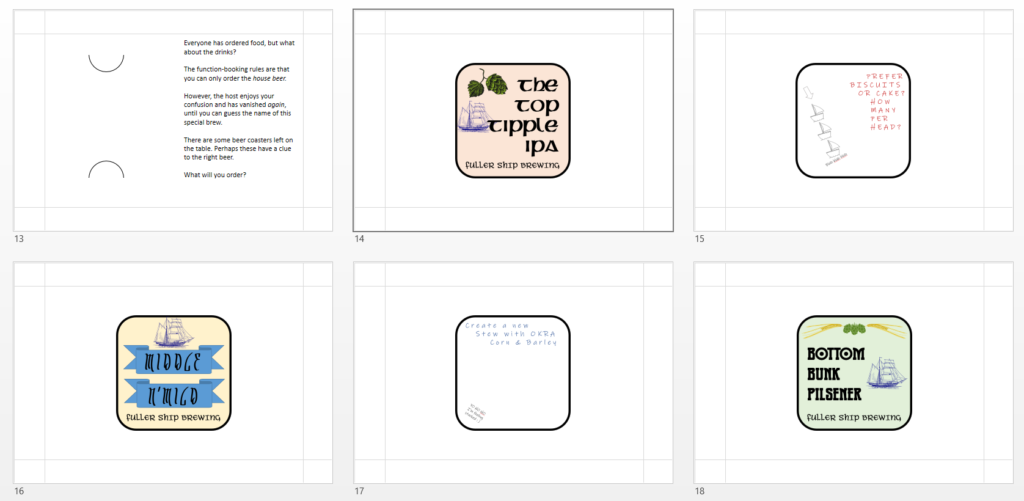
Puzzle 5 – Stacking beermats
Another slightly weak premise for a fun puzzle. The host won’t tell the players the name of the house beer. They have to deduce it from the beermats, from the Fuller Ship Brewery.
The scribbles on the back of the mats give the clue to stack mats so that the ships (on the front of each mat) on top of each other, then flip the stack. Then the scribbles combine to name the house beer.
The beers named on the front of the mats are Top Tipple, Middle Mild and Bottom Bunk, which is the clue about what order to stack them.
This is one that the gamers all struggled with. I think more clues would have helped. They were also about three pints in at this stage though.
Puzzle 6 – Bathroom maze
In this puzzle, the gamers have to solve a maze that contains an equation along the route.
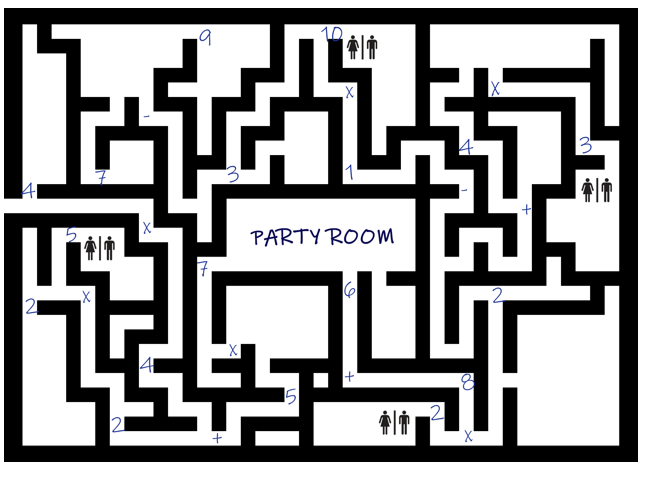
That in itself is easy, as long as they remember BODMAS. However, this puzzle has a few callbacks and gotchas:
- They are moving around the venue, so they have to use the mask. The message in the mask says to ‘add 1 for number one…’. The Twine app will accept both +1 and +2 answers, with a different ‘correct’ message in each case.
- The initial instruction card says they have to use the West bathroom only.
- How do they know which way is West? I tore off a corner of the map and taped it to the inside of the box lid. The lid itself has compass points marked on it. When they find the missing corner, they find the solution.
Puzzle 10 – The code from the bar
Skipping a few puzzle that are unique to my company. Near the end of the run, the games have to find a code. This is and oldie, but a goodie.
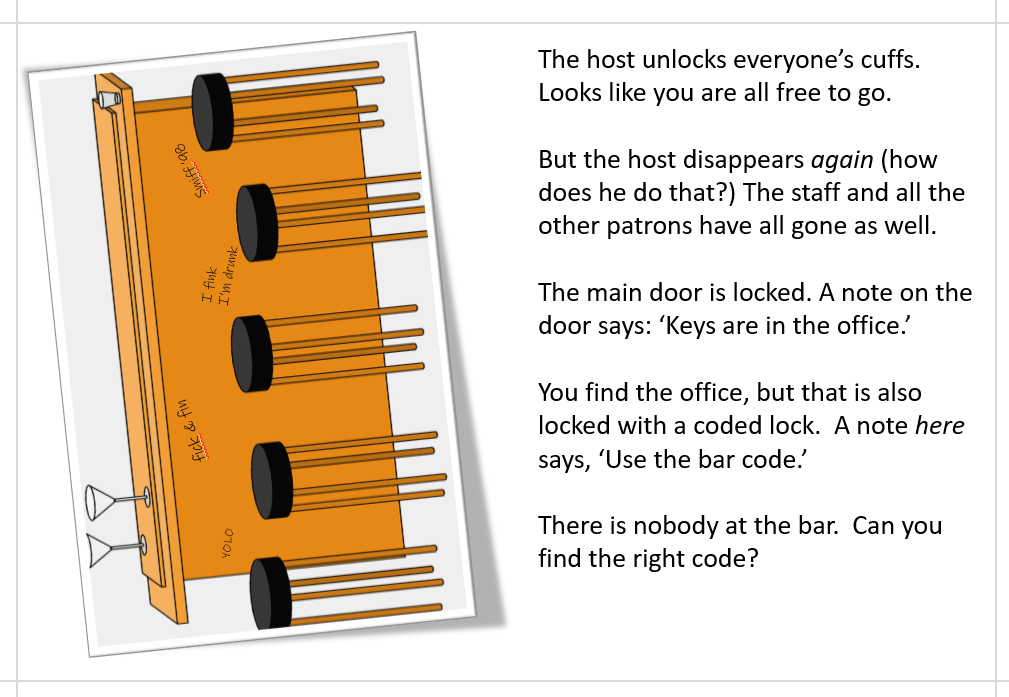
Spoiler alert: When I printed the box wraps, I put a barcode on them. Breaks the fourth wall just a bit.

Summing up
So that’s what I put together this year. The key things that I think other amateur escape room designers should take away are:
- The game’s puzzles were printed out on folded paper. There’s no real need to make a complicated card system for a managed event.
- A mobile website can be easy to setup and will automate the answer checking – it can also automate giving out clues when a wrong answer it put in. I noticed that on this occasion, people never actually put wrong answers in: They either confidently arrived at the right answer, or were still puzzling.
- Several of the puzzles used callbacks to previous information. Gamers enjoy when this happens because it makes them feel clever without having to do a lot of crunching. The best puzzles were simple to solve as long as all information was considered.
- I used wordplay for a few puzzles, where a clue is given when considering alternate meanings of a word or phrase. In this setting, that didn’t pan out so well: People skimmed the puzzle text and went right into the solving. I had to prompt people to re-read when they got stuck.
I hope this article is of use to people who are considering putting together an escape room or other puzzle experience in future. Hit me up on Twitter if you have any comments.